We left the previous update with the a lot of the car coming together separately. Since then, it has literally been a case of bolting things on and reassembling ready to get to the point of starting the car to then tune and drive it. We had a bit of a pic drop where the car was clearly at various stages as things were completed at whatever I felt like doing at the time (yes we went a bit headless chicken sorting various things out then getting distracted by something else).
Scuttle and pedal box
This bit is easy, it literally assembled back and dropped on the car. This had been done several times as I chased wires and played with the dash etc etc. The detectives out there will have noticed I slipped a picture in my last post with it all fitted, but here it is:


So not exactly mind blowing change here, just a lick of paint.
The real change is on the other side.........
New DigiDash/Dash Panel
This is probably my favourite part of the car. Mainly because it actually looks right and decent. I purchased a new Digidash back when the Mx5 speedo cable kept braking but it never really worked....but that was because I never go round to sorting the speedo out as I was consistently "going to rebuild soon"...for best part of 9 months. Anyway, a couple more bits added - wash/wipe buttons - again something that got neglected forever - but now work! And a lower switch panel overhaul.

The reason this probably worked is because I planned it. See sketches and test material? Winner. Wish I did this for everything!

With the lower dash panel fitted, it was looking good....but here is where the real magic happens. Illumination. My favourite close up shot of the car going
You can also see the new 12v socket and USB socket too. Because eBay.

Seats
I should probably actually fit these now, they are kinda useful and much comfier than the floor. However, we have a major issue straight away. This photo below is at eye level with the seat on the adjustable runners....

Don't know about you but I kinda like looking over my steering wheel and not through it. Became apparent that my old seat base had lots of framework and padding, this GRP/Carbon seat basically sits on the floor! Off I go to buy some 50mm box section to raise me up.

Much better, looks like a perfect excuse for a new smaller steering wheel now, wink wink. Currently rocking a 13inch wheel off the MX5 donor I first used. 11-12inch should see me right.
Bonnet Part 2

We left the last post with the bonnet not fitting. Uh oh. Sadly, as cool as it looks without one, I think a bonnet might be a legal requirement.....so time to get inventive.
I decided the best look could come from an induction cowl style hood. Obviously money is tight and with the view of one day getting it done properly, ghetto mods are required.
 Enter this monstrosity! In a bit to give my filters clearance, I had to raise the centre approx 150mm with approx 100mm of bonnet left to try keep some rigidity possible without bracing it to death.
So, plan 2. Ramair style. It aint pretty but it fits. The mesh helps finish it off and bracing straps keep it from flapping about when I take it off.
I'll be honest....its growing on me.
I'll be honest....its growing on me.
Again, using photos out of order, some people might see a new/improved addition.....
New Rear Wing
Ok, so strictly speaking, its not new. Same wing. The mounts and location though, they are.


Well, it raised it up substantially!
A little too high for my liking, despite probably being more functional there. However the aero on this beast is worse than a brick so as before, its the aesthetics I'm aiming for.
A little too high for my liking, despite probably being more functional there. However the aero on this beast is worse than a brick so as before, its the aesthetics I'm aiming for.

Off I go to use my proper CAD skills to get a model to have watercut as my scissors weren't gonna cut it (pun shamelessly intended) when it came to the final aluminium design.
With a little bit of bracing in the rear panel, it was fitted. Aaaaaand with the customary colour scheme.

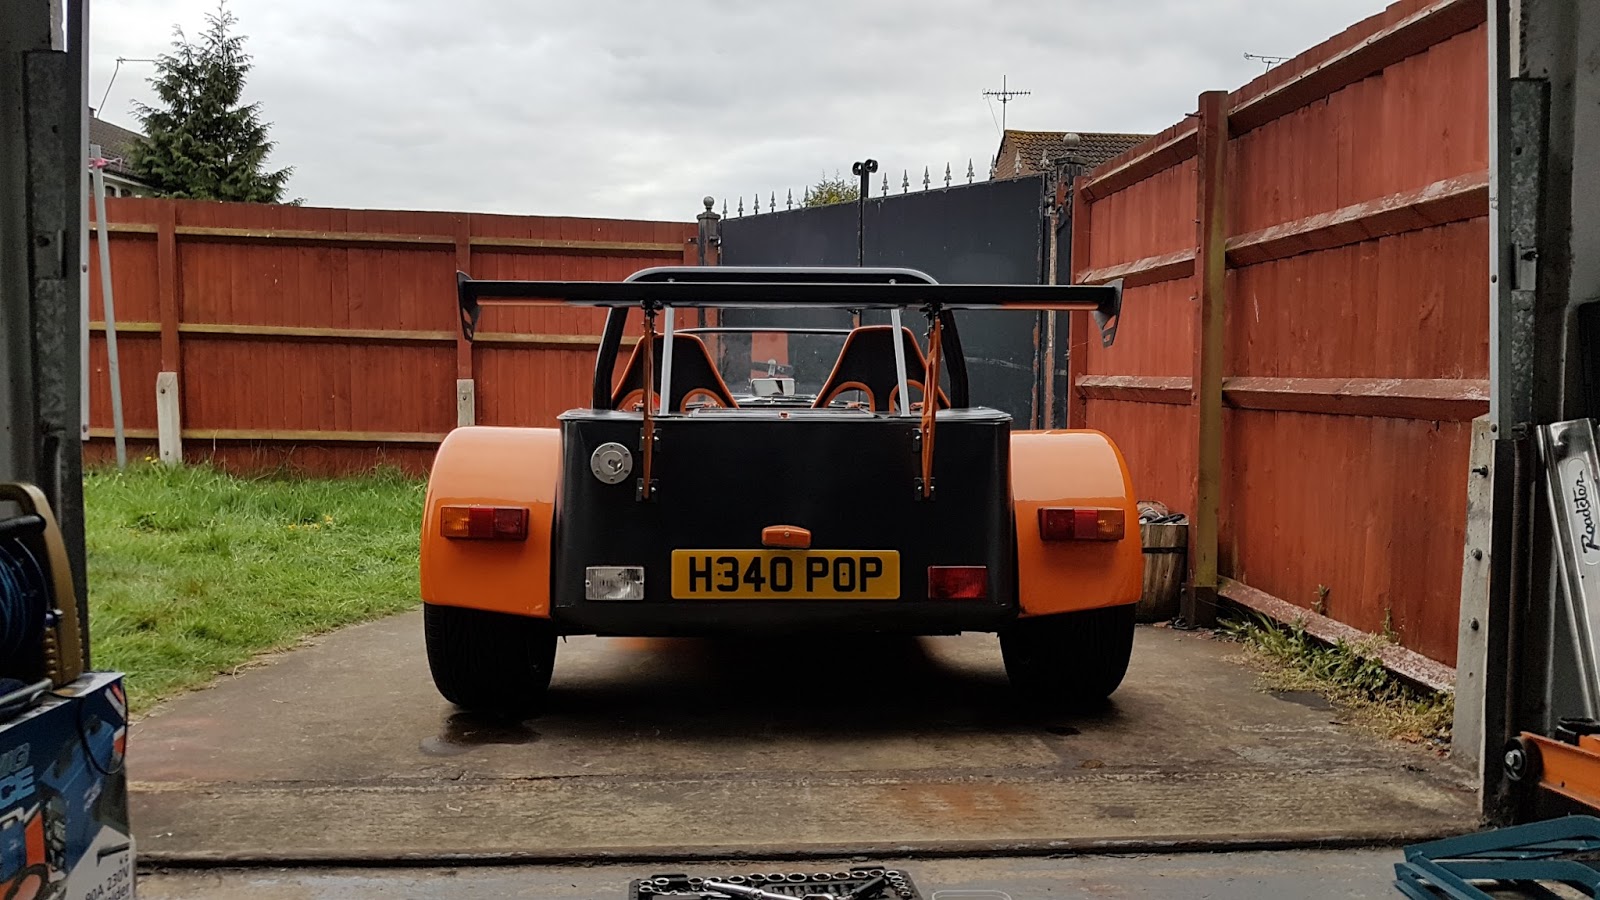

So there you have it. I'd say thats looking pretty much there now, right?
WRONG.
I still have mapping to do and get the engine running properly. Now we can get onto the fun and juicy stuff!
WRONG.
I still have mapping to do and get the engine running properly. Now we can get onto the fun and juicy stuff!